Saturday, July 14, 2012

Daring Kitchen - En Pappillote

Blog-checking lines: Our July 2012 Daring Cooks’ host was Sarah from All Our Fingers in the Pie! Sarah challenges us to learn a new cooking technique called “Cooking En Papillote” which is French and translates to “cooking in parchment”.


I did something completely different for this challenge.  I cooked it for just myself!  Usually I like to invite friends over to share, or at the very least I cook for Hilary and I.  But Hilary is in BC visiting family, and I'm home on my own.  I had originally thought that I was going to sit this month out since I didn't have anyone to cook for, but then I figured I have to eat too.

This month the challenge was a cooking technique using parchment paper to hold in all the juices and goodness while your food steams.  It's a very low fat, healthy way to cook, which is just what I need.


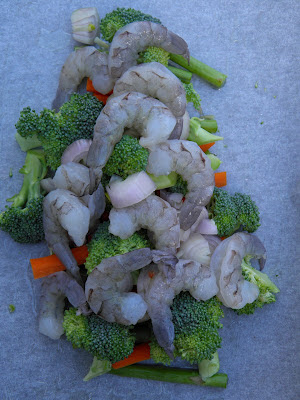
I cooked asparagus, shallots, carrots, broccoli and shrimp for my dinner.

All arranged on the parchment.  I was having fun taking the pictures, so I forgot to season the food before folding it up.  I added it after it cooked and it tasted just fine.


All sealed up and ready to go in the oven.


I found that the shallots were a bit to raw for my liking, but everything else was cooked to perfection.


It only took 12 minutes to cook, and maybe 5 minutes to prep.  This is definitely a technique that I will use again.

Wednesday, July 11, 2012

Liam's 10th Birthday


HAPPY BIRTHDAY LIAM!

Monday, July 9, 2012

Done!

Hilary and Liam are in the air and on their way home and his room is all done!!

Saturday, July 7, 2012

It's starting to come together.


Originally I was going to put the Lego plate on the ceiling.  But then I stepped on a piece of Lego, and I figured it would not be nice to roll over on a piece in bed.  So it's on the wall so that he can still build Lego creations in bed.  The blue bag hanging on the side of the bed is to hold Lego pieces.


I'm having fun with the glue gun now that I'm getting the hang of it!  I covered the frame of his bulletin board in Lego pieces.

Day 7 - Light Switch Cover

 
The light switch cover is what started the whole idea for the Lego room.  I came across one on Pinterest that someone was selling on Etsy.  Selling for $50+ !  I figured I could do it myself for way less. I know that Lego is expensive, but we have a tonne of extra pieces, including about 10 Harry Potters.

So I broke out the glue gun and got to work.  And I'm very pleased with the result!

Friday, July 6, 2012

Day 6 - Shelves


I've taken a break the last few days, but now I'm ready to get back it and get 'er done!

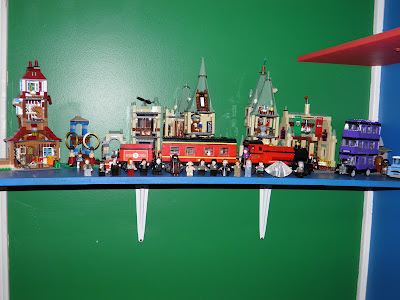
A friend from work came over an helped me hang the shelves.  Now Liam will have a place to display all his treasures like his Lego Harry Potter collection.  And he'll even have somewhere to put his glasses at night.

Tuesday, July 3, 2012

Day 3 - Project 1


For his door.  Gluing Lego is a lot harder then it should be!

Monday, July 2, 2012

Day 2 - Painting FINISHED


It's so satisfying to pull down all the tape and see the white accents.  All four walls are done and everything is cleaned up.  I have some white to touch up, but not today.   

I have a week left to finish all the Lego accent projects I have planned, move all the furniture and toys from upstairs and get the shelves hung.  And something about having to go to work every day too..... 

I was doing so well....

 
Till that happened.  At least the green was dry so it was easy enough to clean up, but the baseboard will need to be painted.

Day 2 - Paint


I love the green and blue together and the yellow is so bright and cheery!  I'm also painting 4 shelves in each of the colours.  I'll have to see once the furniture is in where I end up putting them.

Only one wall to go....  RED!

Sunday, July 1, 2012

Of course....


....I ran out of tape.  


And everything is closed tomorrow.  I'll have to be very, Very, VERY  careful right there.

Day 1 - Prep


The walls are washed, the holes are filled.  Once it dries I can sand it, vacuum and start taping.  And then the horrible beige colour can be gone.